A blog about things I like

If you are interested in quilting, patchwork, children's literature and books in general, you've come to the right blog.

Saturday 30 November 2019

The saga of the sky blue satin formal dress

My daughter had her heart set on pale blue formal dress,  but nothing we saw in the shops fit the bill. So we thought we would make one. We settled on a Burda pattern, burda 6519  but when I asked at spotlight if they had satin back crepe the answer was “no - but we have satin and crepe, you could maybe join them with interfacing...” .... I don’t think she got it!
Here’s the inspo pic to show what she had in mind...

The remnant warehouse stocks beautiful ex designer fabric and I found the perfect shade of blue on their website. After checking with DD that she liked the colour I bought ten metres, since they have a discount when you buy ten or more. I knew DD wanted it longer and I thought it’s best to have spare.


First I traced off the pattern, adding 15cm to the length, and made a toile for fit purposes using some lining I sourced from vinnies. The bodice was a bit long so I cut 2cm off the length; and also took it in by 1cm at CB. I reattached the skirt, installed a zip and she tried it on again - and decreed it a success. Phew. She had one more request - could I scoop out the back to make it a bit more glamorous? I said of course..


We cut out the dress on the big tables at school. Having a helper was essential as the fabric was rather heavy and kept trying to slide off the table. We needed five skirt panels, on the pattern they were identical but DD wanted a split so we added 1cm to the seam allowance of two of them. DD decided she’d like the crepe on the outside for a matte effect.

Sewing up the dress was relatively easy, apart from the weight of the fabric which tended to drag the garment out from under the needle making my seams a bit wiggly. When DD tried it on minus zip, the bodice was dragged down by the weight of the skirt and met the skirt at a place which wasn’t terribly flattering: so I took the skirt off, cut off 2cm from the length of the bodice and also brought it in st the side seams so it would fit more snugly. Once I’d made those changes I sewed the skirt back on, added the zipper and made a rolled hem with wooly nylon on the overlocker. I would have preferred a hand stitched hem but since it was the NIGHT BEFORE the formal I decided a rolled hem would be expedient. 

Then she tried it on again. I was hoping after my adjustments that it would fit. However, the fabric must have been much stretchier than the lining I used for the toile as the bodice once again was stretched out towards her hips and she declared it made her look like a rectangle and could it be more figure hugging please?! Also she wanted the slit which I’d made mid thigh to start much higher - 13cm higher to be precise. Back to the sewing room!


I unpicked the zip then unpicked the skirt for the second time (well the third time if you count the toile) cut another two cm off the bottom of the bodice, removed about 3cm from CB and put it all back together. I also re did the slit. 
When I reinserted the zipper I worked out the CB skirt seam needed to be redone as it had a big pucker at the base of the zip; so I unpicked that seam down to the hem and resewed it, which meant my rolled hem also had to be redone. I took a short cut - sewing the lining to the zipper SA by machine rather than by hand, then did the world’s dodgiest blind stitch to attach the lining to the SA of the skirt. It was so loose and loopy I had to warn DD not to put her fingers through it when trying on the dress! We had no more time for any further fittings since the formal was THE SAME NIGHT, so I felt Very nervous while she tried it on and ta-dah... it fit! 
 Slit perfect height for showing off the tan!

Back of bodice looks nothing like a rectangle!
 And some photos of the dress on the night:
She loved the swishy skirt and the satin on the inside felt divine


Aww

Sadly we did not manage a photo together with her dad 


The only thing I would change was that I sent her out on a solo mission to buy a strapless bra to wear with it, and she picked a lacy one which slightly showed through. I’d have chosen a seamless type. Also, I’d added some reinforcing stitches to the original slit which turned out a bit hard to unpick, so when I remade it I wasn’t happy with the finish at that point, but you’ve got to be up pretty close to notice it so that’s ok. The kid was thrilled, and it sounds cheesy but if she’s happy I’m happy! Every time someone complimented her on her dress she told them her mum made it, so that made me feel pretty good too. ❤️❤️❤️


Saturday 16 November 2019

Bettina - a swishy full circle skirt

I made a Bettina skirt using the new pattern from Rebecca Page - here's my review: A pretty swish looking, voluminous skirt. This one would be stunning in evening fabric for a special occasion, it really does have the wow factor. Instructions quite straight forward.

The skirt is made from five panels, with a waistband and an invisible zipper at centre back. I used a screen printed cotton I bought at Ikea many years ago, it has been waiting in my stash for a skirt such as this. I cut the skirt out on the cross grain to save fabric, and made sure to top and tail each pattern piece. Thank goodness the fish are not swimming in any particular direction! It does have pockets. The instructions say to use French seams, but normal seams do the job for pretty much all fabrics except the most delicate. 
Photo credit goes to my grumpy teenage daughter (she's only grumpy because she's embarrassed to be seen in public taking photos of her mother!)


Thursday 24 October 2019

Testing the Empress dress

I was recently given the opportunity to test a new dress pattern for Kiwi designer Lydia of Little Kiwi's Closet.  Being a pattern tester is a lot of fun! I was given the pattern in advance, and was required to sew up a couple of versions in my size, and give feedback on the fit and instructions.

I immediately saw that this pattern is going to be very flattering on ladies of various figure types. The front princess line panel has an elongating effect, and you could tone it down by making the whole dress from one fabric if you liked. The slimline version can be made with pockets in the side front panels, and can also be made in a top length. The swing version has a lovely flowy hemline, which I am a fan of.
I made my first version with some ponte and sweater knit I found at Vinnies. The ponte turned out to not have quite enough stretch, so this dress is a bit tight for my liking. I made the low scoop neck version, with the swing skirt. I was going for a more "corporate" look with this one.


Next up, I used the slimline version to make a top. I didn't have enough of the centre fabric for a dress length. The top ended up rather long, more like a tunic than a tshirt length, so I am wearing it tucked into my pencil skirt. The outer panels and cap sleeves are organic cotton lycra, and the centre is gorgeous organic french terry, both from Zingara. Alas this version was also a teeny bit tight - not at all the fault of the pattern as I think I under-estimated my measurements. Or maybe my tape stretched a bit??? Anyway..


 this is the shirt out! 

Finally, my favourite version is this swing dress with french terry for the centre and matching cotton lycra for the rest, once again from Zingara, which is turning out to be my most favourite fabric supplier ever. It is not cheap...but worth every penny.
I thought long and hard about what to make with this blue french terry. Originally I was thinking a hoody, or tracksuit pants, but I didn't want to end up looking wider thanks to the horizontal stripe effect. It would just be "too much", you know? The Empress dress with its elegantly slimming panels to the rescue! And by now I'd got the fit right so I was confident to cut out my beautiful blue fabric. I would always advise making a toile first if you're nervous about a new pattern and don't want to waste special fabric. 


If you look up close, you can see the stripes are actually conifers! And I can never say that word without singing the TMBG song, so here it is for your viewing pleasure. Thank you to Lydia for allowing me to test this gorgeous pattern, and to Beate from Zingara for keeping the beautiful fabric coming. You can buy the Empress pattern here: https://littlekiwis.co.nz/product/womens-empress-dress and it is available for girls aged NB - 12 and Ladies sized XS to 5X. 

Sunday 13 October 2019

Dora the Explorer

I have accepted a position as a brand ambassador for Rebecca Page patterns. This sounds pretty glamorous, but what it really means is that each month I receive a free pattern and in exchange I provide modelled photos and some promotion.
In September I sewed the Dora dress, which is a class fit and flare style. I really love the shape of the neckline, the cap sleeves, and the deep V at the back. For my first version, after making a toile, I used my precious Outback Wife 'Elizabeth' print, which I have been hoarding for quite some time now. It is a beautiful brown cotton barkcloth, with yellow and red roses. The perfect vintage style fabric for this vintage style dress.
The bodice on this one is fully lined, as per the instructions, but on my later version I converted the lining to a facing  - because let's face it - a lining means twice as many darts!

My daughter and I headed off down the road to the wetlands for an afternoon photo shoot. This proved challenging, as the scenery was a mixture of sunshine and shadow, plus the photographer was rather grumpy and did not enjoy being bossed around. Anyway, we didn't do too badly!


photobombed by a shadow!


Friday 11 October 2019

Fun with French terry

I love French terry - it’s that stuff that looks like normal tshirt fabric on the outside but on the inside there are little tiny loops like a towel. The loops give the fabric an extra soft feel and add an insulating layer of trapped air. It also reminds me of the 70s when I had quite a few FT garments - shorts and a little tie top singlet come to mind.

For this beautiful FT from Zingara Organic Fabric, I didn’t want a pattern with too many pieces, sometimes less is more and a simple dress can really let the fabric design shine. The Kussecht dress from Jojolino was perfect - only one piece for both front & back, simple dolman sleeves, a facing at the neckline and it’s done. A quick and easy sew that looks good on a curvy figure (well I like it anyway!)


I used the same pattern earlier this year for a FT dress, this one has long sleeves for winter


And back in January I made a sleeveless cotton Lycra dress, which I just love 


I do have a couple more French terry creations to show you but they’re patterns which are currently in testing so you’ll have to wait for them to be released for sale. Stay tuned! 

All fabric from the amazing Zingara Organic Fabric online shop, based in NZ 
Highly recommended! 
And the pattern is Kussecht (I think means kiss?!) from Jojolino, based in Germany. Warning- you must add seam allowance! And the instructions are in German, but it’s an easy one to sew. 
https://www.makerist.de/patterns/ebook-kussecht-gr-32-46

Friday 22 February 2019

Harry Potter Quiltalong Progress

Hi folks, long time no blog!

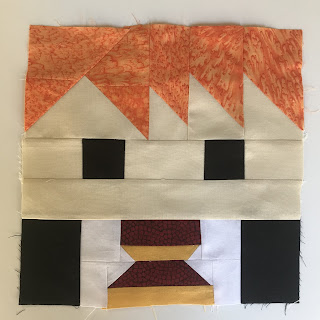
I found a Harry Potter quiltalong somehow on Facebook and on the spur of the moment decided to join in. I thought I’d make a quilt for my brother who is the biggest HP fan in the Southern Hemisphere
https://sewfreshquilts.blogspot.com/p/harry-potter-quilt-along.html?m=1

I had to buy a few solids and the background, but I’m mainly using scraps which makes my heart sing. Cutting said scraps into tiny squares is not so much fun, but the quilt designer is only releasing one block per week so at least there are not too many to cut.


Here’s Harry and the gang